


![]()
![]()
![]()
![]()
![]()
![]()
![]()
![]()
![]()
![]()
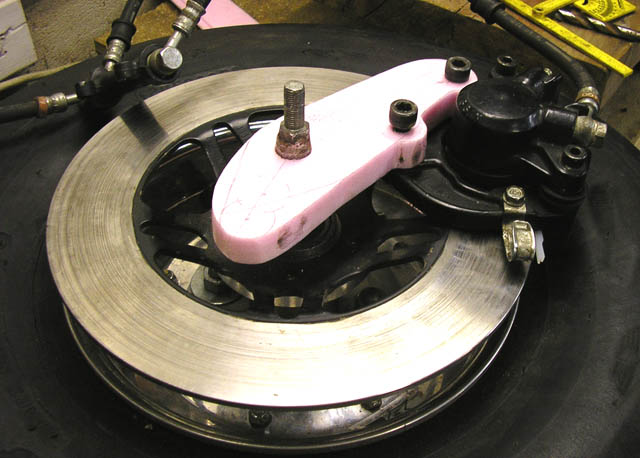
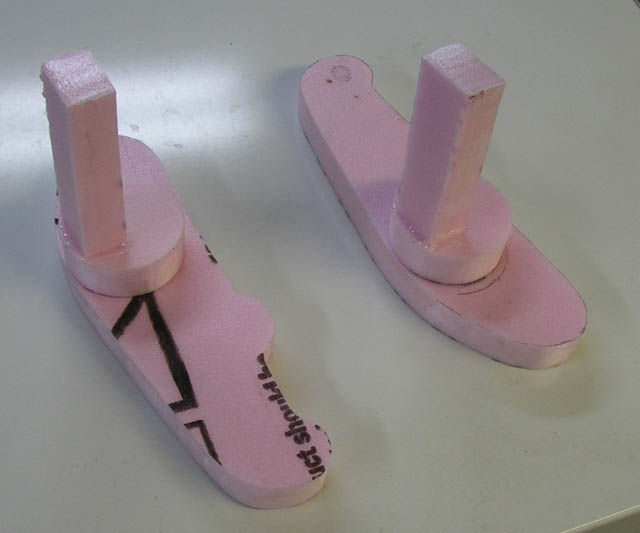
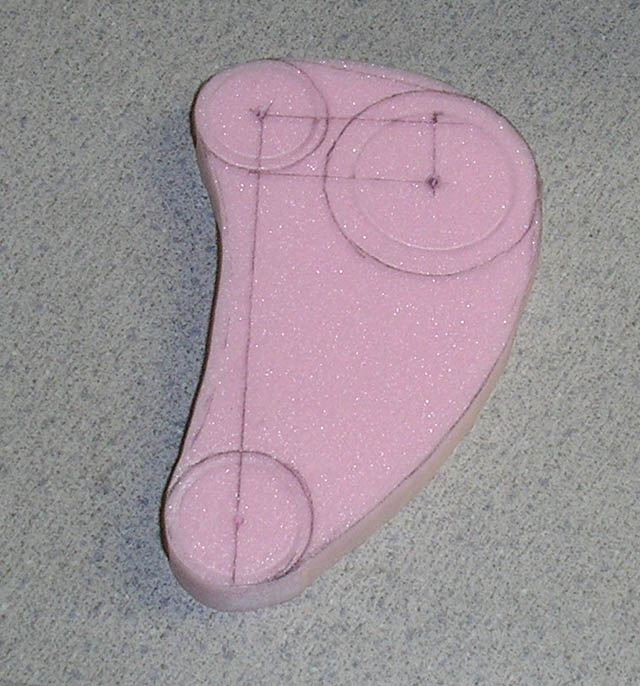
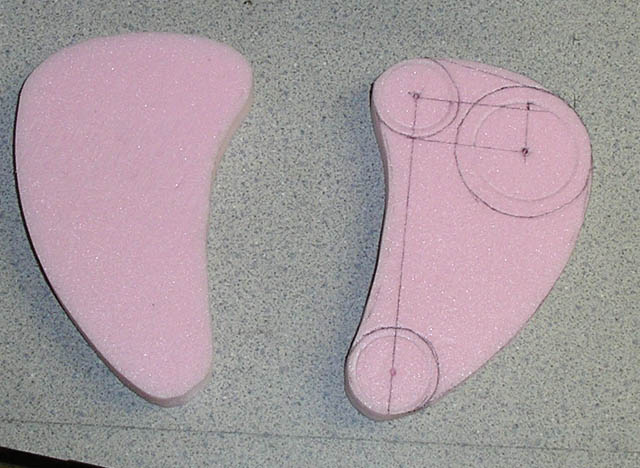
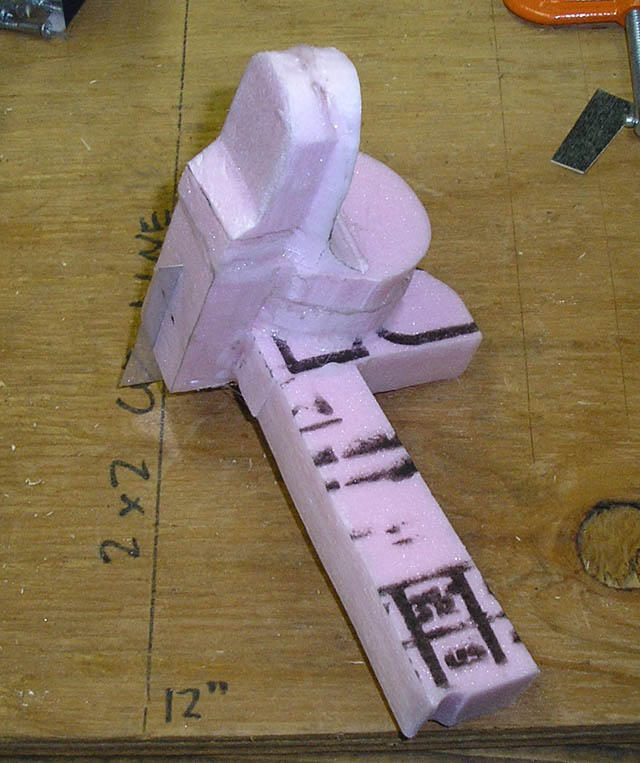
- Update 09/14/2007 - To start with, I designed the caliper mounts and cut them out of pink polystyrene foam on the hot wire foam cutter. I mounted these on the spindle with the brake caliper to make sure everything lines up properly.
Two caliper mounts were made, with a flue glued to them to faciliate the pouring.
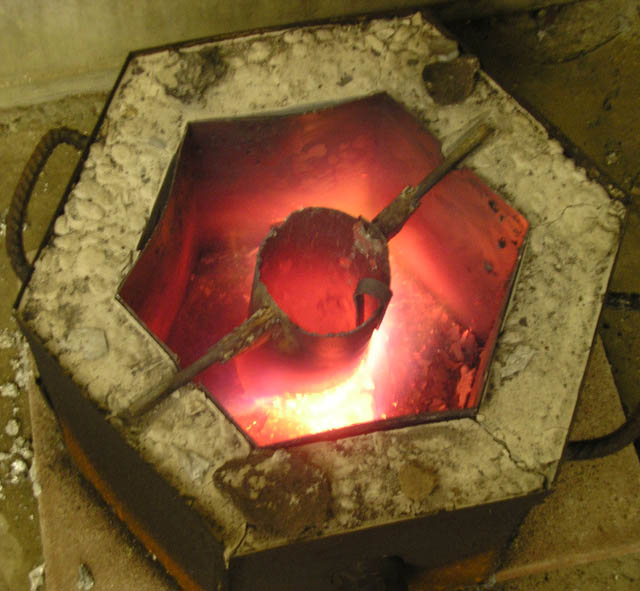
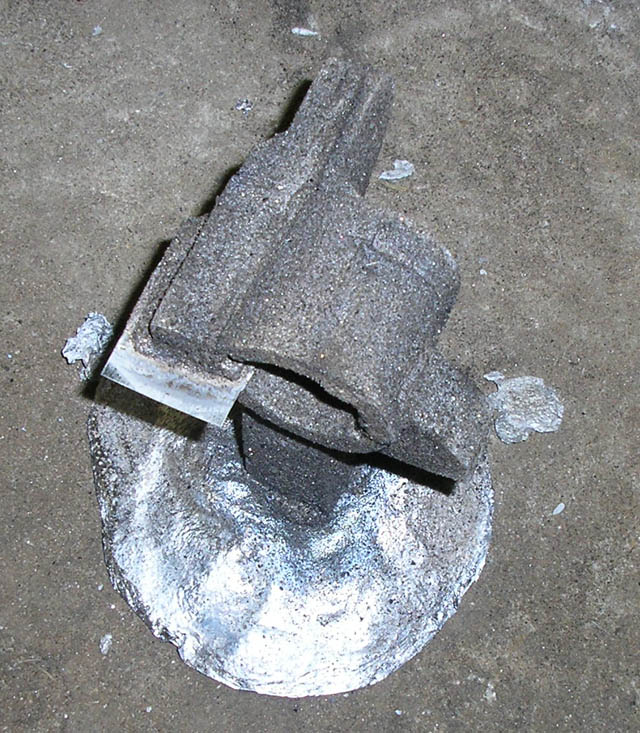
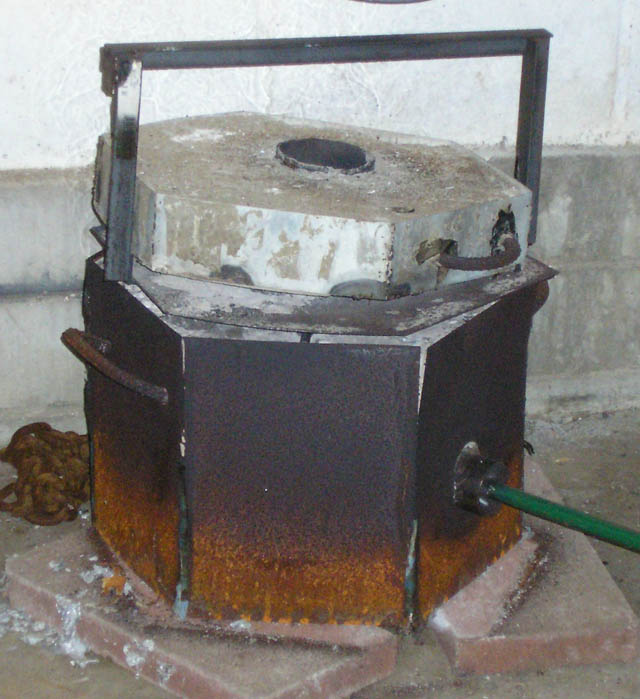
I heated up the aluminum which will make the parts in my kiln. Here is a picture with the lid off.
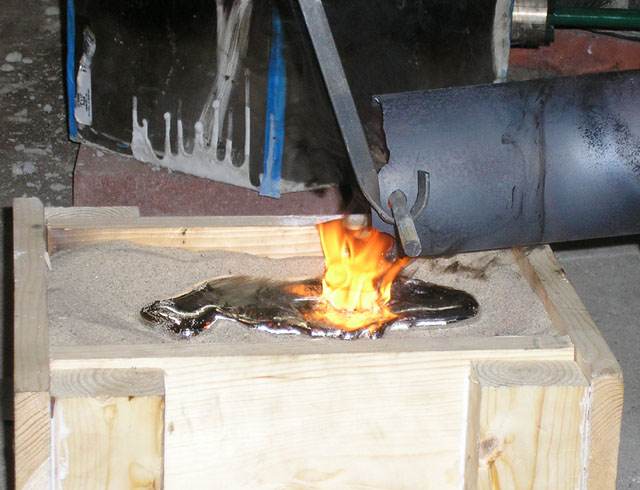
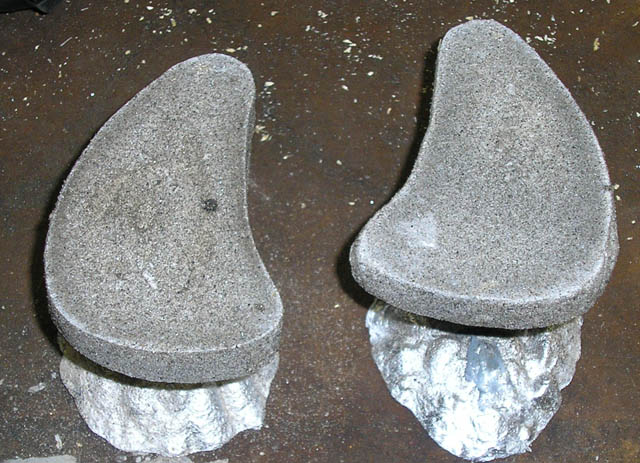
The polystyrene pattern is buried in a sand box, with the flue sticking out. Once the aluminum was melted, it was poured into the sand, evaporating the foam and filling in the space once occupied by the foam.
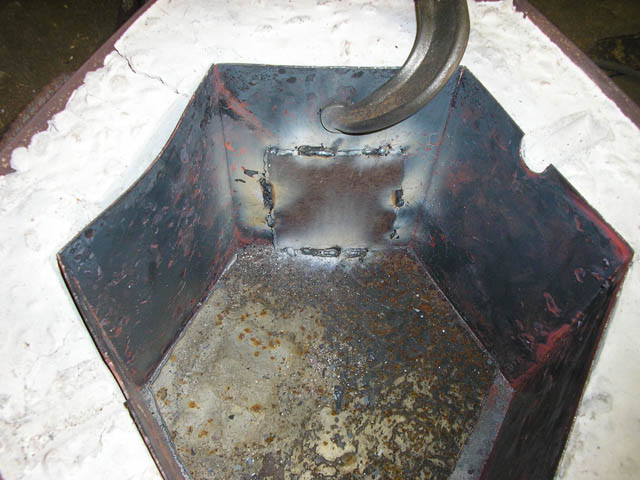
Here is the completed part after cooling removed from the sand.
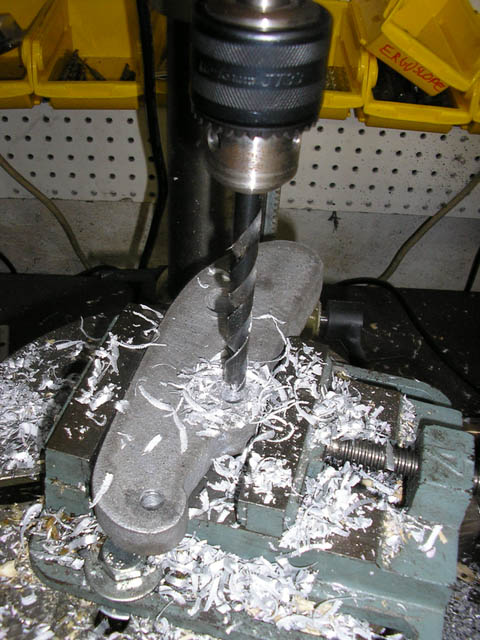
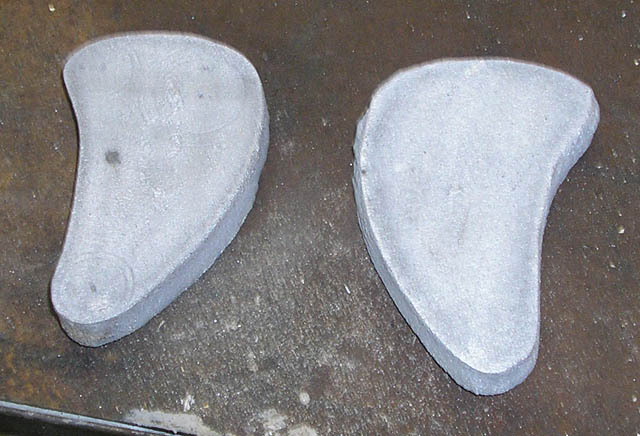
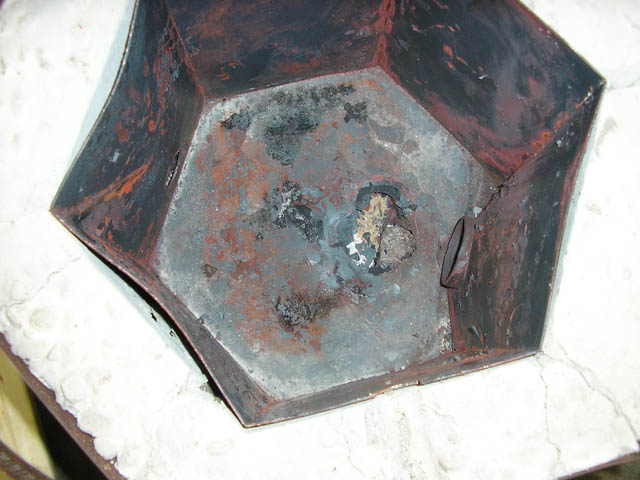
After cleaning the part, I drill out the holes to mount the caliper and for the spindle.
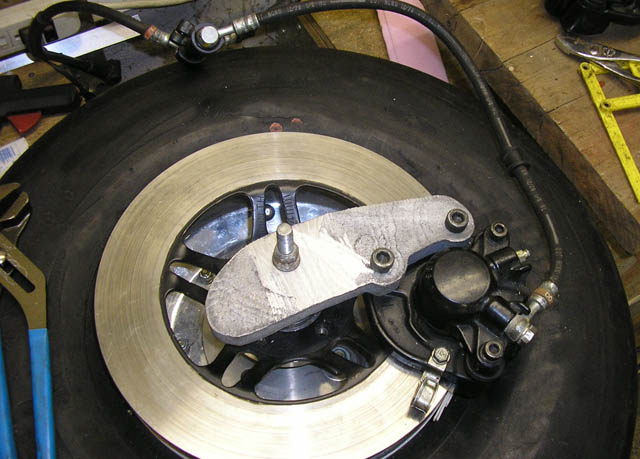
Once cleaned and drilled, I mounted the parts to make sure they fit.
These parts, which are the caliper mounts, are able to freely rotate around the spindle. When the calipers grab the brake rotors, they are pulled forward with the rotating wheel. The reason for this is because on my type of suspension you can utilize the force to counteract the tendancy for a motorcycle to pitch down during braking from the weight transfer.
Here is an animation depicting the whole design.
This animation depicts at first the suspension compressing due to the weight of the bike, this was just to verify all the parts fit correctly after moving. After spinning for a second, the brakes are applied, and you see the caliper dragged forward with the rotor. This leverages against the torque bar and forces the leading link to extend outward. When adjusted properly, this can diminish or exactly cancel the tendancy to dive under braking.
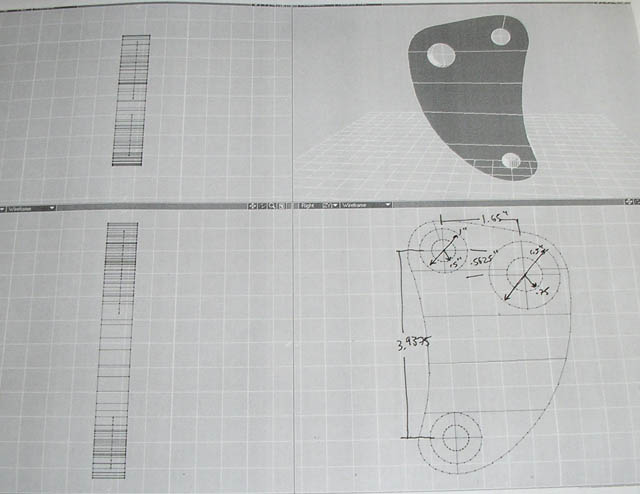
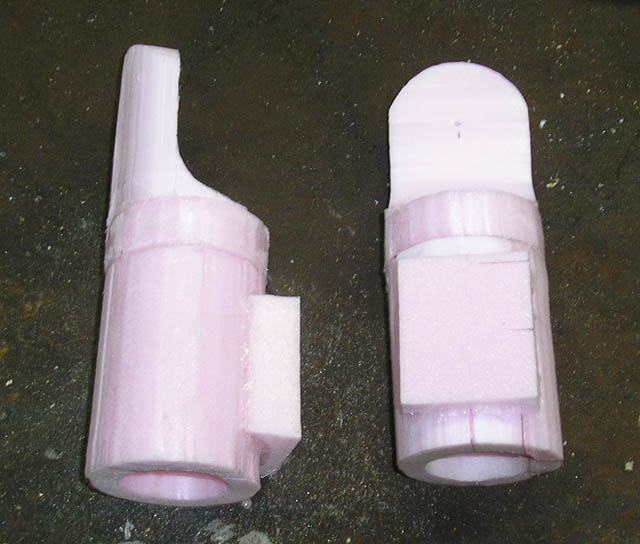
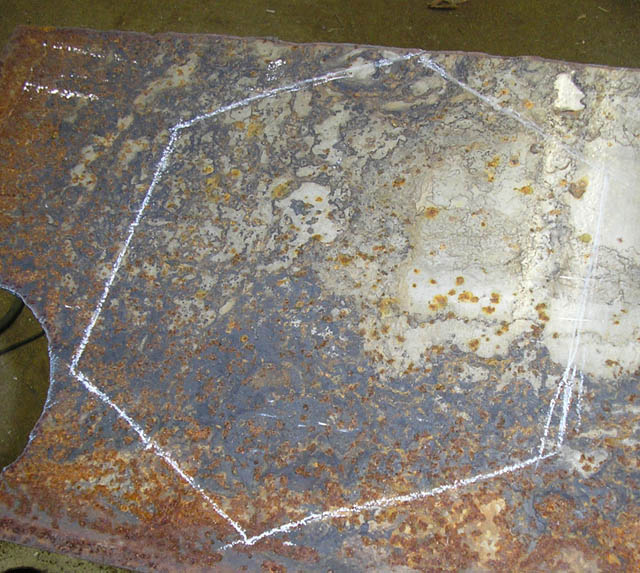
Next up then is the leading link, here is the design.
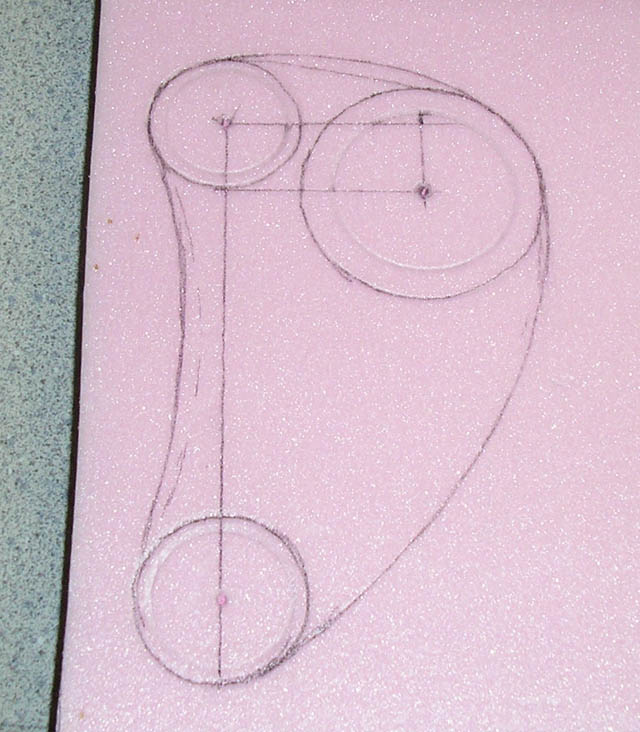
Transferred to polystyrene foam.
Here is the pattern after it has been cut out.
Cutting out a second one.
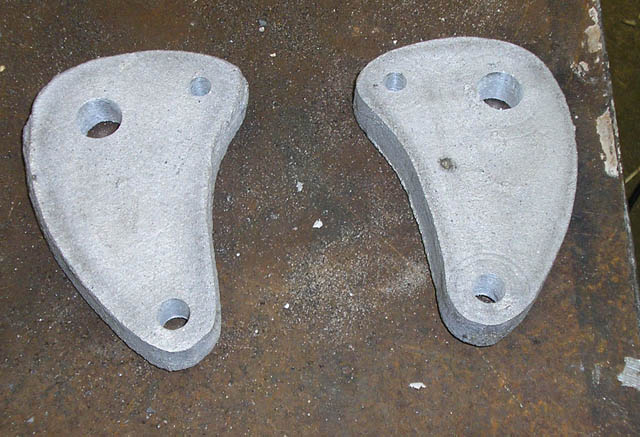
The leading links after castin.
After clearning. Notice you can still see the pen scribe marks from the pattern.
At this point, I started making the suspension mounting bracket, this would connect the suspension to the leading link
Here is the part after casting.
The casting was going great, so I rushed right on and made the fork mounts out of foam.
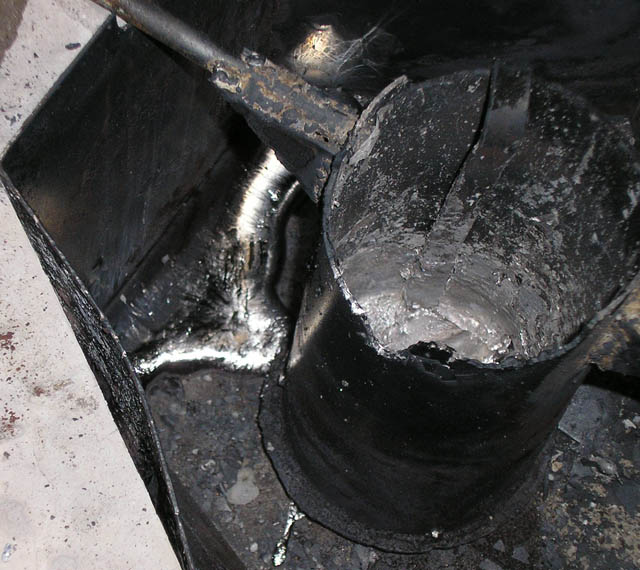
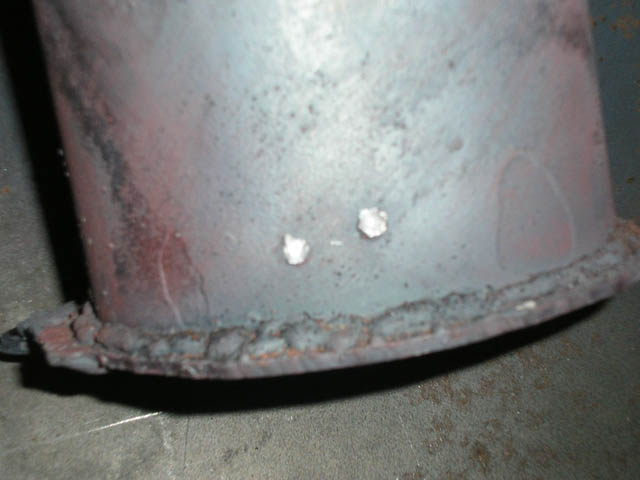
Before I had the chance to pour these, disaster struck! My kiln sprung a leak. See at the left of the picture the molten aluminum spilling out into the bottom of the kiln.
The molten aluminum actually appeared to 'punch' holes through the crucible. There were three holes, two on this side, one on the opposing side. Each was about the same time, it was odd they all occured within a few seconds of each other.
Well, time to make a new crucible. This one made it through about 100 pours, which is pretty good considering it was made out of 1/8" thick steel. My Kiln wasnt looking to great by this time either, all those heating / cooling cycles warped and cracked everything. But again, for 100+ pours, its in pretty good shape.
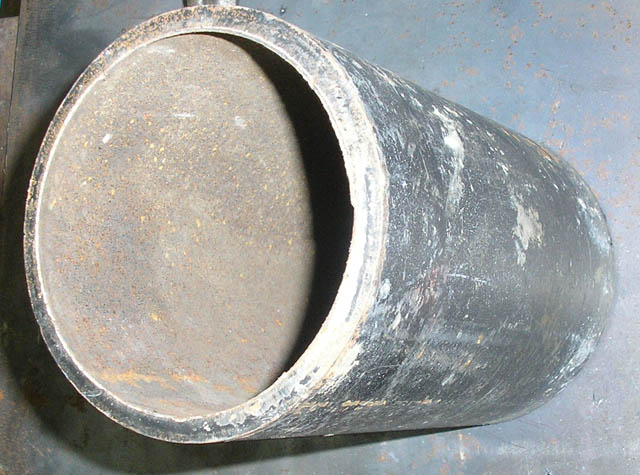
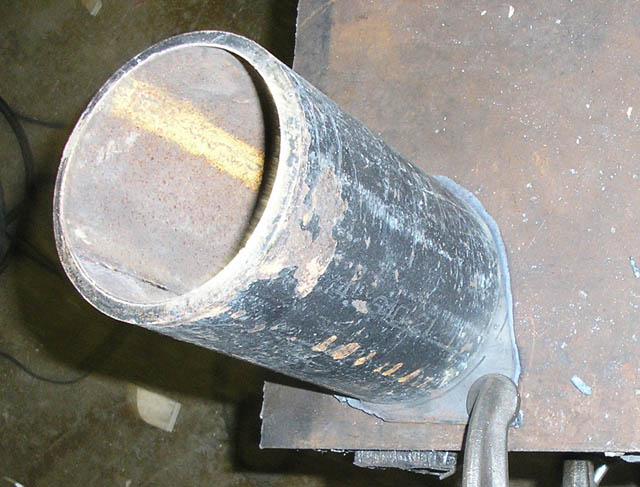
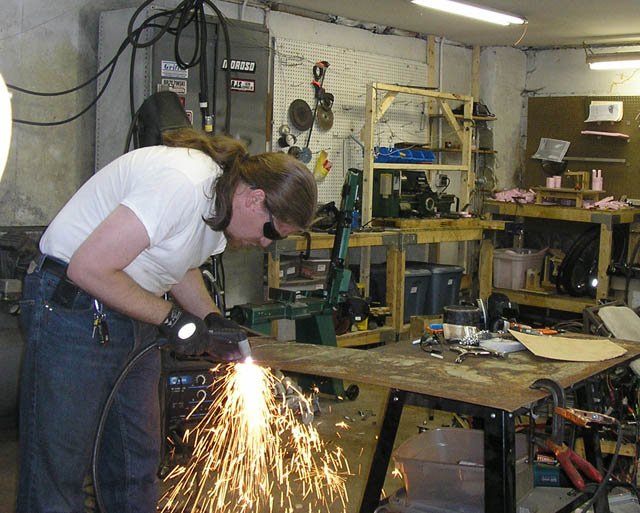
So at this point I was side tracked from the motorcycle project and moved into fixing the kiln and making a new crucible. I was hoping to find some 5" or 6" diameter threaded steel pipe to use as an easily replaceable crucible. I visted a few plumbing supply stores with no luck. One found 5" steel nipples and an end cap. I told him what I was using it for (everybody seems to automatically get suspicious and think you are making a pipe bomb or something stupid) so he's typing away to look up the price, then says "...Oh, ... you don't even want to know how much these cost" $45 each! Wow, no thanks. He actually recommended a nearbye scrap steel place. I went there and found this great 5.5" diameter thick walled steel pipe, about 6' of it, for $9! Excellent. Here is the segment cut and ready to have a base welded to it.
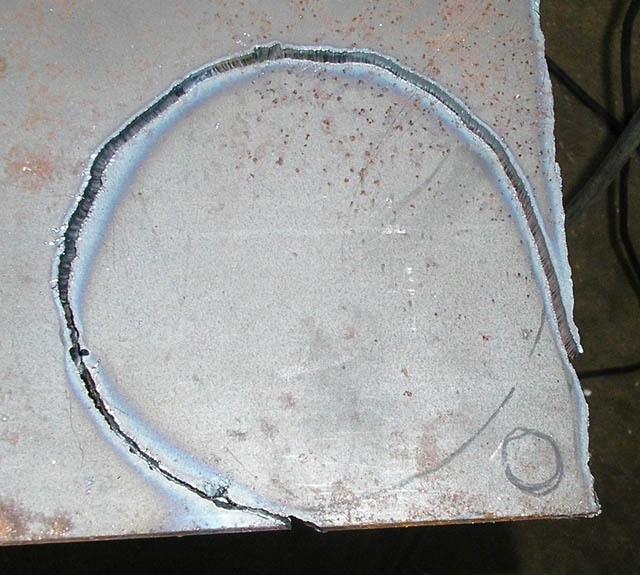
I cut the base out of 1/4" steel plate using my plasma cutter.
Mounted for welding
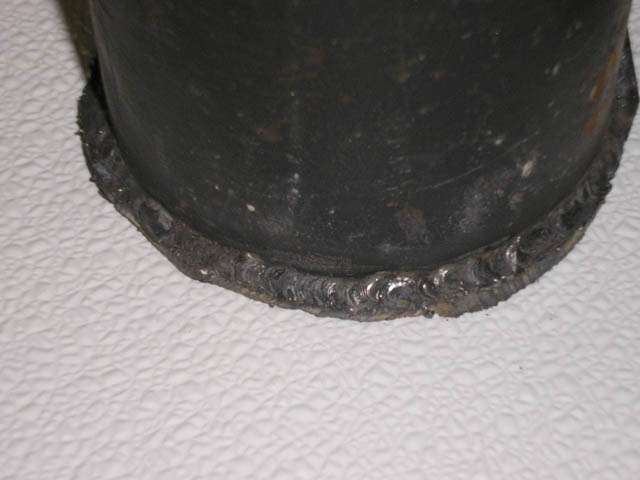
Superb weld! 1/4" steel is really easy to weld.
The sorry state of the kiln, a hole has burned into the bottom plate.
Traced out a replacement piece for the bottom.
Cutting it out with the plasma cutter.
With the new base in. I also want to add a fresh air vent port to get better higher temperature burns. Because the wall all ready had a hole in it, I welded a new plate over it, in order to drill a good hole in it.
The lid needed some serious repair, here is the lid inverted, I have all the edges clamped together and started welding C's out of angle iron around each face.
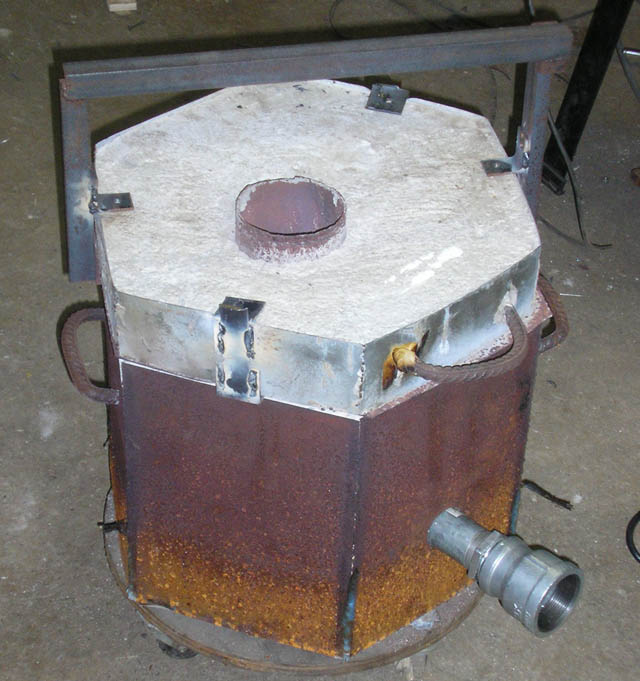
Kiln 1.5 - Here is the repaired kiln. Better than new! Notice the new hot air port in the front lower right, and all the clamps around the lid.
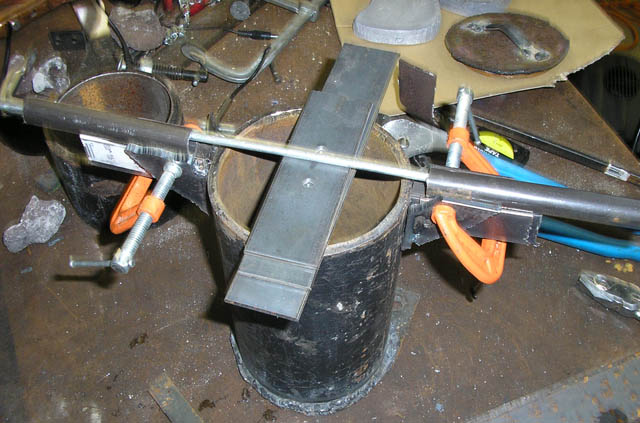
Back to the crucible then. Here is the hanging bars being jigged up for welding.
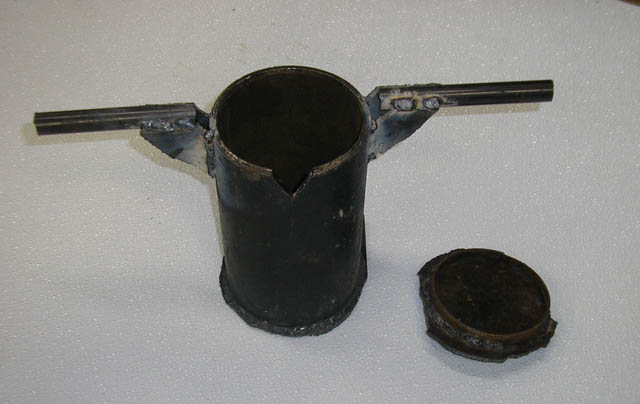
So here is crucible 2.0, along with a lid I welded together to help keep exhaust gases out of the crucible.
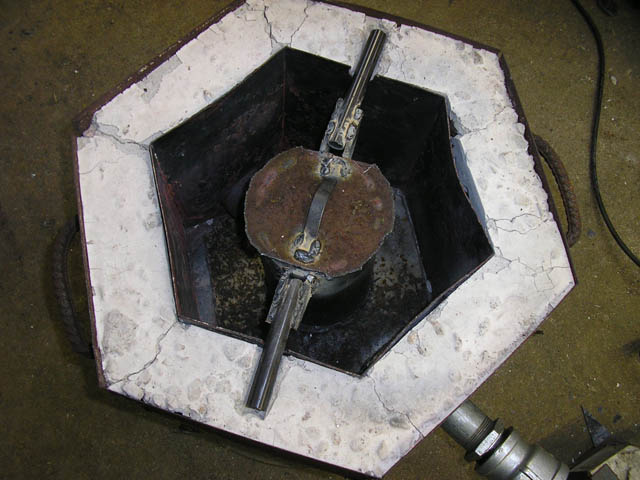
The new crucible in the repaired kiln
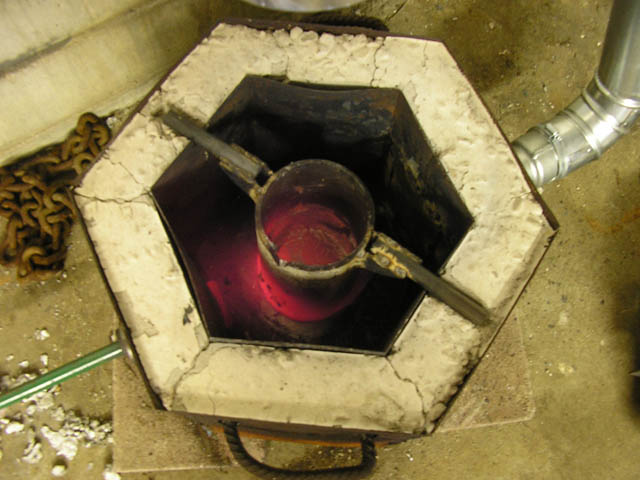
Heated up, everything is looking good!
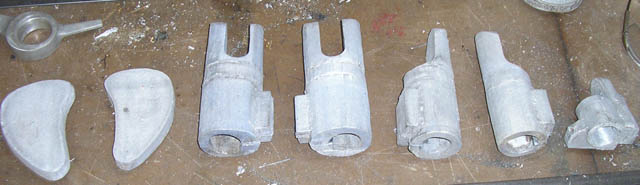
So back to work, I spent an afternoon casting and now had all the parts necessary for making the front end.
From left to right are the leading links, a new pair of fork mounts and the old pair (I recast the fork mounts in a sturdier version, in case the single sided mounts were not strong enough) and the finally is one of the suspension mounts. The last suspension mount is not in this picture.
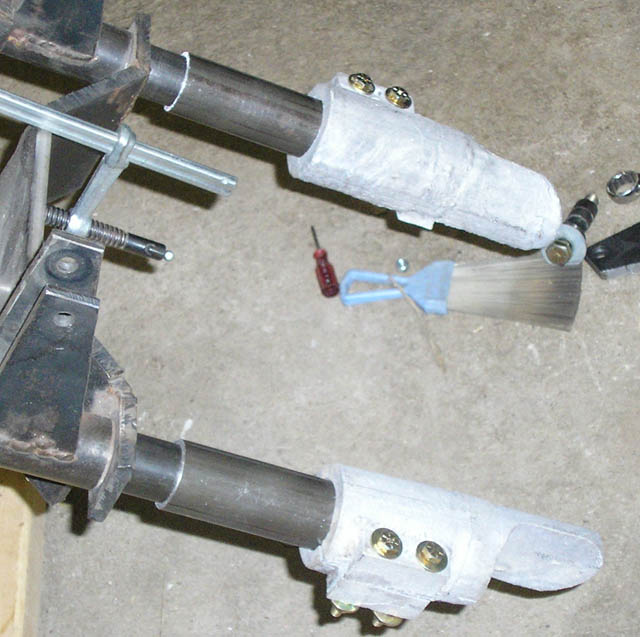
So, the fork mounts drilled and mounted on the fork
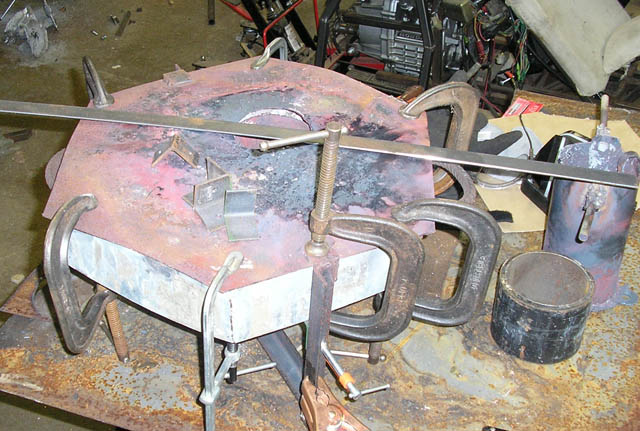
Pilot holes drilled out of the leading links. They are drilled and lined up together to make sure everything is in line.
The leading links drilled out, a 3/8" hole at the top for the suspension mount, a 3/4" hole for the spindle, and a 1/2" to mount to the fork. Each of this will be drilled out slightly larger and pushed with bronze bearings.
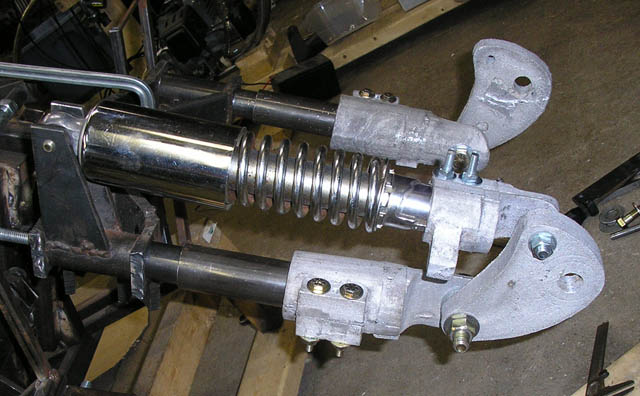
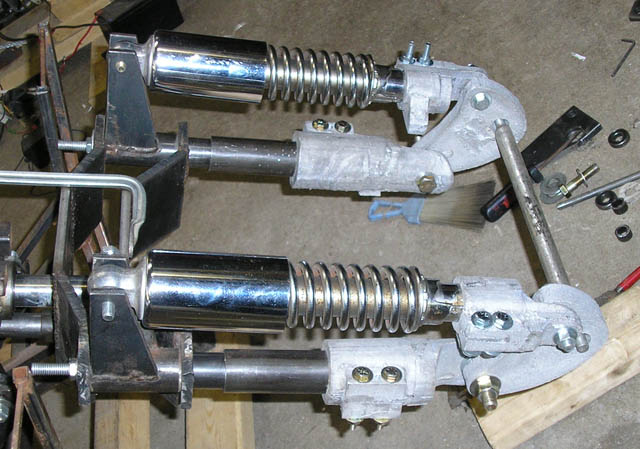
Coming together, the fork mount bolted to the leading link bolted to the suspension mount.
Everything together with the spindle.
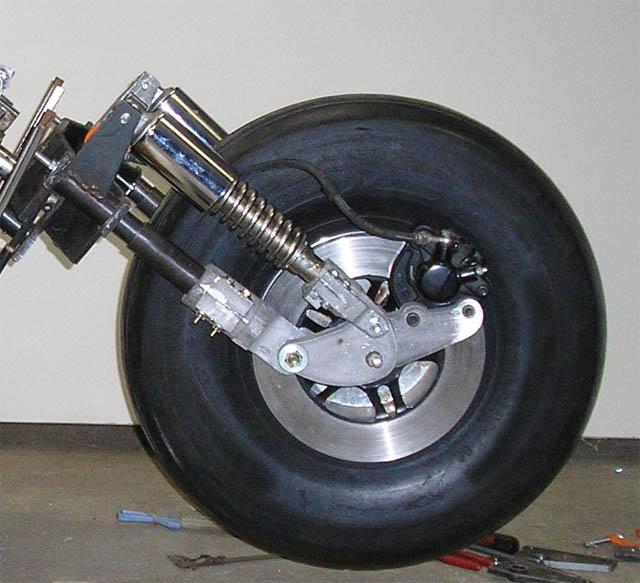
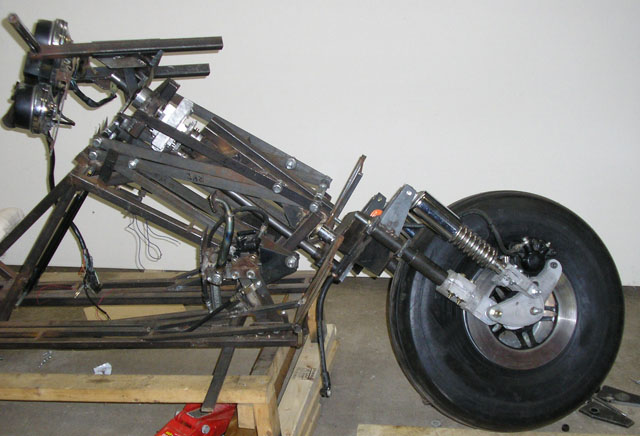
So here is the result, all parts mounted. These are just temporary mounts, I need to put bronze bearing in and thrust washers still.
So here is the front of the bike, turning away from the camera at 30 degrees.
- Back to Status - To Next Update - |
![]()
![]()
![]()